TIL: Python has a cmd module
The cmd module contains a single class called Cmd which handles all the
details of creating an application similar to Python’s REPL. All you need to do
is to provide some command definitions and the Cmd class will handle the rest.
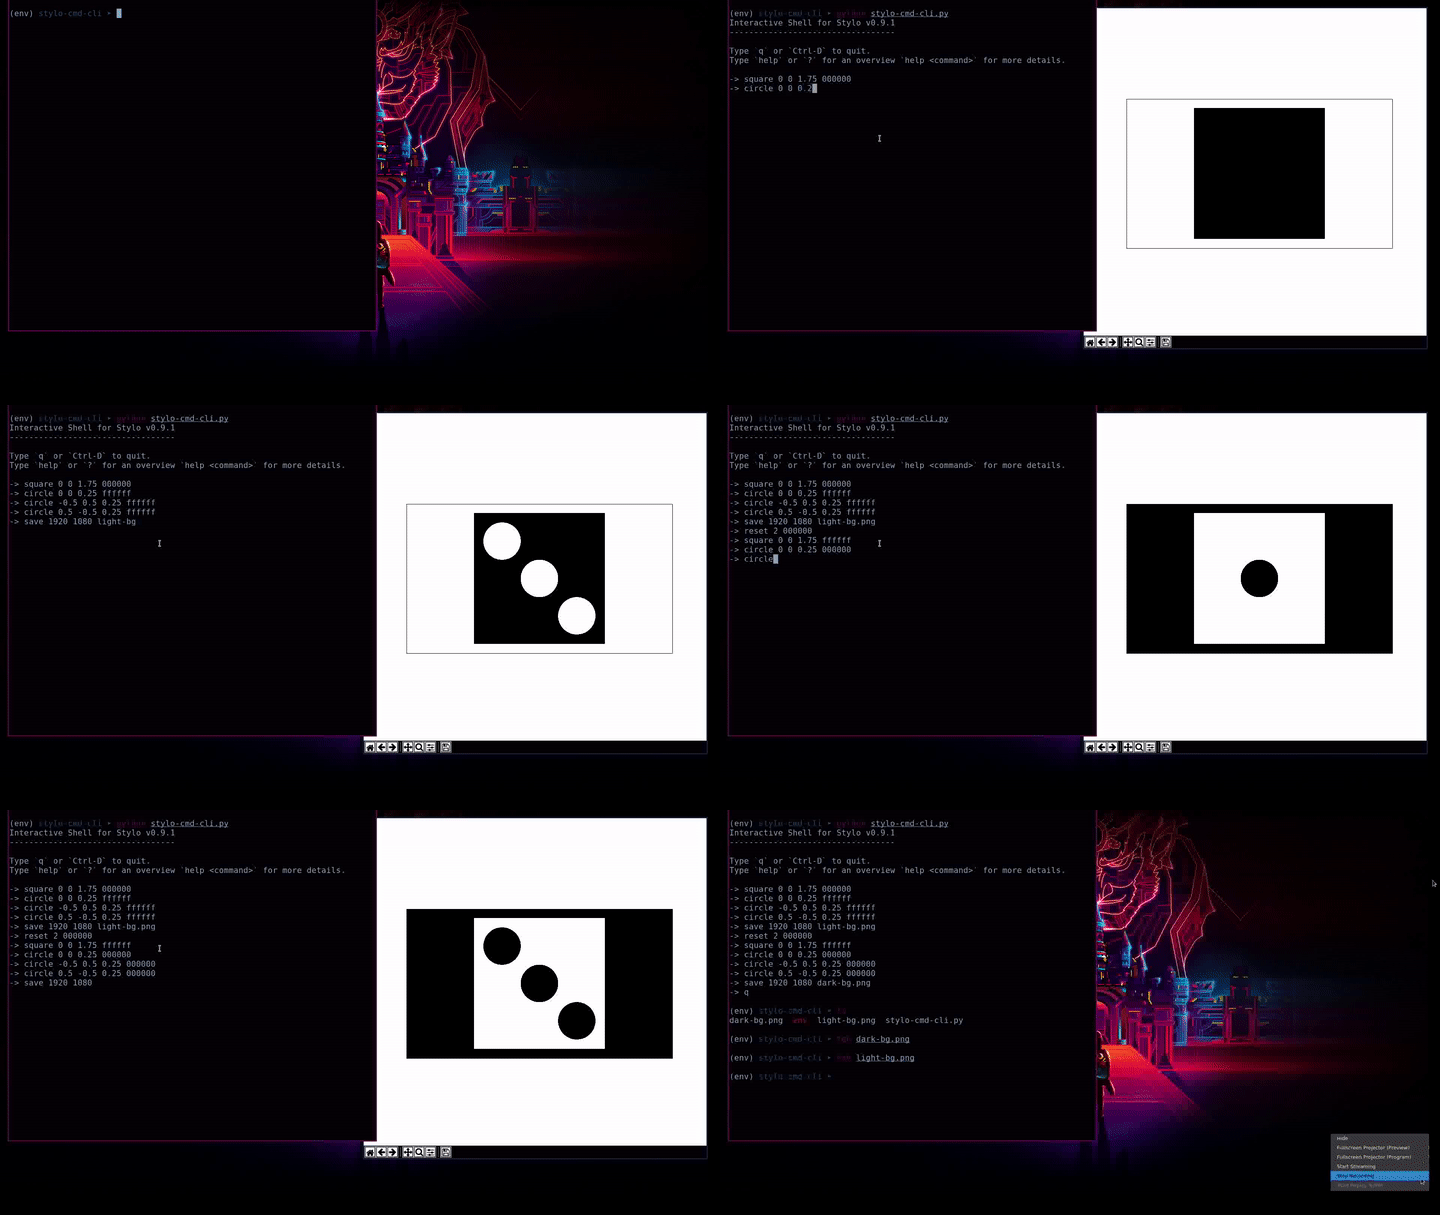
In an attempt to demonstrate why I think this is so cool I’m going to walk through the process of building the application you see in the screencast above.
The example application we’re going to create is a very basic REPL for a passion project of mine called stylo. Stylo is a Python library that allows you to draw images and create animations using code and some mathematics. The application will expose some of the basic shapes available and for the “Print” part of the REPL it will show a preview of your image.
My main focus for this post is the cmd module which means I’m not going to go
into any of the specifics of stylo or how to use it. If you want to know more
about it I will point you in the direction of the documentation
(under construction) and the example gallery
Setup
To start with we’re going to create a virtual environment and install stylo
into it. This will also install matplotlib which we will be using later on.
I’m using Python 3.7 but this application should work on all versions of Python
≥ 3.5.
$ python -m venv env
$ source env/bin/activate
(env) $ pip install stylo
Note: The cmd module is available for even older versions of
Python. However we are limited by stylo which only supports Python 3.5+
With the dependencies out of the way we can create a file called stylo-cmd.py
and start writing some code!
import cmd

class StyloPrompt(cmd.Cmd):
   pass

if __name__ == '__main__':
   prompt = StyloPrompt()
 prompt.cmdloop()
This is the bare minimum required to get something we can start playing with.
If you were to run python stylo-cmd.py you would see the following prompt
which comes with a single built-in command help.
(Cmd) help

Documented commands (type help <topic>):
========================================
help
Ctrl-C will exit the application. Obviously this is pretty useless right now so let’s look at adding in some commands of our own.
Adding Commands
Any method on our StyloPrompt class with a name of the form do_* is
considered a command, with the command name given by whatever is after the
underscore. To get ourselves warmed up let’s add two commands reset and
save which will allow us to create a fresh image and save it to a file.
from stylo.image import LayeredImage

class StyloPrompt(cmd.Cmd):

   def __init__(self):
      super().__init__()
      self.image = LayeredImage()

   def do_reset(self, args):
      self.image = LayeredImage()

   def do_save(self, args):
      width, height, filename = args.split(" ")

      width = int(width)
      height = int(height)

      self.image(width, height, filename=filename)
As you can see each command receives its arguments as a single string and
it is up to the method to handle them - including conversions to appropriate
data types as is the case with the width and height arguments. For the sake
of being brief proper error handling has been omitted.
Now if we were to fire up the application we would be able to produce an image!
(Cmd) reset
(Cmd) save 1920 1080 image.png
Of course this image is currently empty so next we should add the ability for
the user to place shapes on the image. We’ll create two more commands circle
and square.
from stylo.color import FillColor
from stylo.shape import Circle, Square

class StyloPrompt(cmd.Cmd):
   ...

   def do_circle(self, args):
      x, y, r, color = args.split(" ")

      circle = Circle(float(x), float(y), float(r), fill=True)
      self.image.add_layer(circle, FillColor(color))

   def do_square(self, args):
      x, y, size, color = args.split(" ")

      square = Square(float(x), float(y), float(size))
      self.image.add_layer(square, FillColor(color))
Now when we use the application we can create something a bit more interesting than a snowman in a blizzard!

Number 3 on a dice
(Cmd) square 0 0 1.75 000000
(Cmd) circle 0 0 0.3 ffffff
(Cmd) circle -0.5 0.5 0.3 ffffff
(Cmd) circle 0.5 -0.5 0.3 ffffff
(Cmd) save 1920 1080 image.png
Getting Help
Now that we have a few commands available we need to tell users how they can be
used. If we were to use the help command we would see something like the
following.
(Cmd) help

Documented commands (type help <topic>):
========================================
help

Undocumented commands:
======================
circle reset save square
Not very helpful.
Thankfully the default help system doesn’t require much to get started, all we
have to do is add docstrings to our do_* methods!
def do_circle(self, args):
   """usage: circle <x> <y> <r> <color>

   This command will draw a circle centered at the coordinates (<x>, <y>)
   with radius given by <r>. The <color> argument is a 6 digit hex
   representing a color in RGB format.
   """
   ...
Now if we were to run help circle
(Cmd) help circle
circle <x> <y> <r> <color>

      This command will draw a circle centered at the coordinates (<x>, <y>)
      with radius given by <r>. The <color> argument is a 6 digit hex
      representing a color in RGB format.
Much better
Giving Feedback
Right now our program is… ok. The user can type in a few commands and they can create some images, but it’s not much of a step up from using the library as they still have to wait until they have saved their image before they can view it. Add in the fact that our program isn’t that flexible they may as well be using the library directly.
If only there was some way we could show the user their image as they build it up a command at a time…
Enter postcmd! This handy method is called each time our program has
processed a command - we can use this to redraw the image each time.
Then “all” we have to do if find a way to display the current image to the user.
After some searching and head scratching I was able to come up with the
following matplotlib incantation to add our image to a figure and display it.
...
import matplotlib.pyplot as plt

class StyloPrompt(cmd.Cmd):

   def __init__(self):
      ...

      self.fig, self.ax = plt.subplots(1)
      self.ax.get_xaxis().set_visible(False)
      self.ax.get_yaxis().set_visible(False)

      self.update_image()
   ...

   def postcmd(self, stop, line):

      if stop:
            return True

      self.update_image()

   def update_image(self):

      # Re-render the image
      self.image(1920, 1080)

      # Update the preview
      self.ax.imshow(image.data)
      self.fig.show()
I won’t go into too much detail here but I will point out a few things.
The
stopargument topostcmdindicates whether the previous command wanted to exit the program (by returningTrue). We have the option of overriding that by not returningTrue. But in our case we will just pass the message on.Matplotlib is smart enough to use an existing window when calling
show()on a figure so all we have to do is update the plot in the axis objectIn the
__init__method we are disabling the scale on the axis so that the user doesn’t see something that looks like a graph.
Finishing Touches
With most of the functionality out of the way we can look at tweaking some things to make the overall experience nicer.
Exiting the Program
So far we don’t have a clean way to close the program, we can hit Ctrl-C to terminate the script but it results in Python printing a traceback and it looks like an error in our program more than anything.
Instead we can override the default method on our class. This method is
called whenever the program doesn’t recogise the user’s input as a valid
command and we can use it to look at all of the user’s input (not just the
args) and decide what to do with it.
In this case we will say that the program will exit whenever the user types a
q or we receive an EOF character (Ctrl-D).
class StyloPrompt(cmd.Cmd):
   ...

   def default(self, line):
      if line == "q" or line == "EOF":
            return True

      return super().default(line)
Changing the Prompt
We can change the default prompt (Cmd) by setting the prompt attribute on
our class.
class StyloPromt(Cmd):
   prompt = "-> "
   ...
Greeting the User
Currently when our program starts it simply shows them the prompt, which if
they are using it for the first time they probably won’t know where to start.
To help them get started we can set the intro attribute to contain a welcome
message.
...
from stylo import __version__

intro_text = """\
Interactive Shell for Stylo v{}
----------------------------------

Type `q` or `Ctrl-D` to quit.
Type `help` or `?` for an overview `help <command>` for more details.
"""

class StyloPrompt(cmd.Cmd):
   intro = intro_text.format(__version__)
   ...
Now when the user starts the program they should have enough information to continue from there.
Interactive Shell for Stylo v0.9.1
----------------------------------

Type `q` or `Ctrl-D` to quit.
Type `help` or `?` for an overview `help <command>` for more details.

->
There are also doc_header, misc_header and undoc_header that you can set
to include even more information at different points in your program. You can
refer to the docs for more details.
Wrapping Up
I can’t believe I only just found out about this module. I hope you found this as useful as I did and I strongly encourage you to take a look at the docs as there are features there that I didn’t get around to mentioning - such as completion!
For those interested the final version of this program (with a few minor tweaks) is available as a Gist on Github. I think what I like most about this module is that it requires very little code before you start seeing real results - Our entire application is only 155 lines of code!
